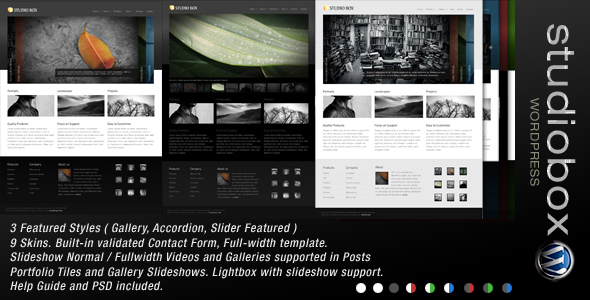
Studio Box
Premium Wordpress Theme
Help guide
Thank you for purchasing StudioBox Premium Wordpress Theme.
 Created: 10th February 2010
By: Mondre Contact : http://themeforest.net/user/imaginem
Studiobox Wordpress Premium Theme By: Mondre blog.yoursite.com
Themeforest Portfolio: http://yoursite.com
If you have any questions that are beyond the scope of this help file, please feel free to email, via my user page contact form at http://yoursite.com
Thank you!
1. About the StudioBox Wordpress theme
This theme is a fixed layout with two columns, except the mainpage and portfolio page which uses the whole page to display contents.
- The header is within “header” div
- Menu is within smoothmenu1div
- All of the information within the main content area is nested within a div with an id of "contents".
- The sidebar's (column #2) content is within a div with an id of "sidebar".
- Footer is within “footer” div
If you would like to edit the color, font, or style of any elements in one of these columns, you would do the following:
#contents { color: #someColor; }
If you find that your new style is not overriding, it is most likely because of a specificity problem. Scroll down in your CSS file and make sure that there isn't a similar style that has more weight.
I.E. #contents .posttitle { color: #someColor; }
So, to ensure that your new styles are applied, make sure that they carry enough "weight" and that there isn't a style lower in the CSS file that is being applied after yours.
2. Fonts, icons and plug-ins in use
Font in use for LOGO (FREE) FONTINFontin
Titillium font used for Cufon
http://www.fontsquirrel.com/fonts/TitilliumText14L
jQuery Loopslider for Featured slides (included)
http://nathansearles.com/loopedslider/
Galleria (included)
http://monc.se/kitchen
Accordion Slider (included)
http://www.dynamicdrive.com/dynamicindex17/haccordion.htm
ColorBox (included)
http://colorpowered.com/colorbox/
3. Cufon Fonts
Cufon font replacements is called in the header.php
The Font configurations are in a JS file with font classes to replace. You'll find the file in the JS directory fontconfig.js
Make changes to it as you prefer. Its straightforward with the class or ID style that need to be replaced with the cufon font.
General Setup
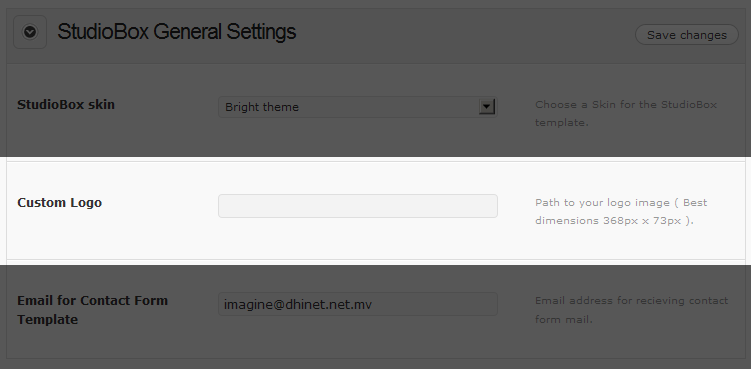
4. Customize Logo
Method 1: The Logo can be customized by entering your Logo image path to the theme options found in Wordpress Admin.
Method 2: The Logo image is in the 'images' folder.
Other than the default logo, the skin logo images can be found in the images/skins/<skin name> folder. If you rename it you should make the change in the header.php
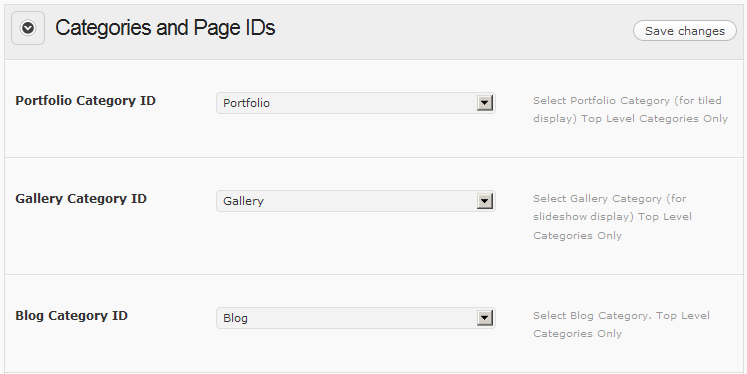
5. Setup Core Categories
Setup Portfolio, Gallery and Blog Categories
Login to Wordpress ADMIN panel
The categories can be most easily made while publishing a ADD NEW Post. You’ll find the Category section on the right hand side of the ADD NEW post page.
- Portfolio
- Gallery
- Blog
Once the categories are created you can link them to the theme through Theme options.
Login to your WP-admin and
Goto StudioBox Options and click of Categories and Page IDs tab
If you require more information do contact me.
NOTE on finding Category , Post and Page ID's
Enter Page ID or Category ID to the relevant input fields in the options.
There are two easy ways to find the Category ID
- If you go to the category, it's ID will be displayed at the end of the url.
- Or, you can go to Manage categories in the ADMIN and hover your mouse over a category, the ID will display in the status bar.
- Follow the same to find the Page and Post ID's.
6. Top Navigation Menu
Setup Featured Category
Login to Wordpress ADMIN panel
Login to your WP-admin and
Goto StudioBox Options and click 'Top Menu Navigation' tab
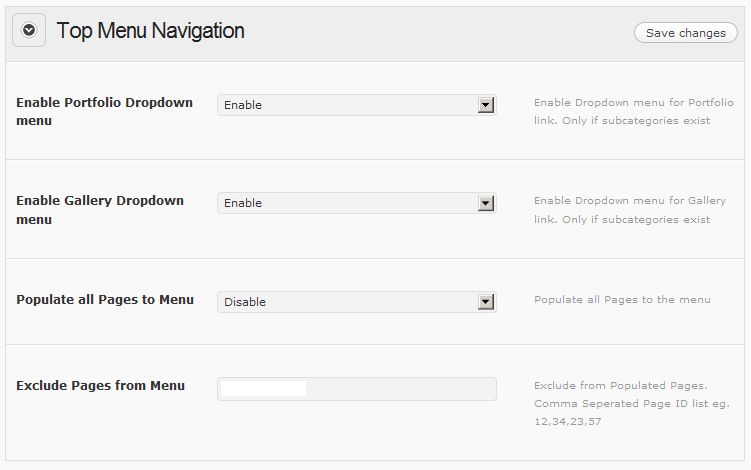
7. Setting up Menu arrows
If arrows don't appear where subcategories exist then
a. Edit ddsmoothmenu.js in the JS Directory
b. Line 19
c. Specify the URL to the arrows in the images directory. (right.gif / down.gif)
d. What you have to change there most likely would be the theme name if it has changed.
//Specify full URL to down and right arrow images (23 is padding-right added to top level LIs with drop downs):
arrowimages: {down:['downarrowclass', 'images/down.gif', 23], right:['rightarrowclass', 'images/right.gif']},
8. Setup cache folder
Timthumb (For Dynamic resizing of images)
http://www.darrenhoyt.com/2008/04/02/timthumb-php-script-released/
Some important things to note:
- TimThumb requires the GD library, which is available on any host sever with PHP 4.3+ installed.
- Make sure the folder in the themes root called "cache" is set to either 775 or 777
Setting up Main Page
9. Post Options Explained
The theme uses the custom fields to display the images in the Post Head, Portfolio gallery, Featured images and embed codes.
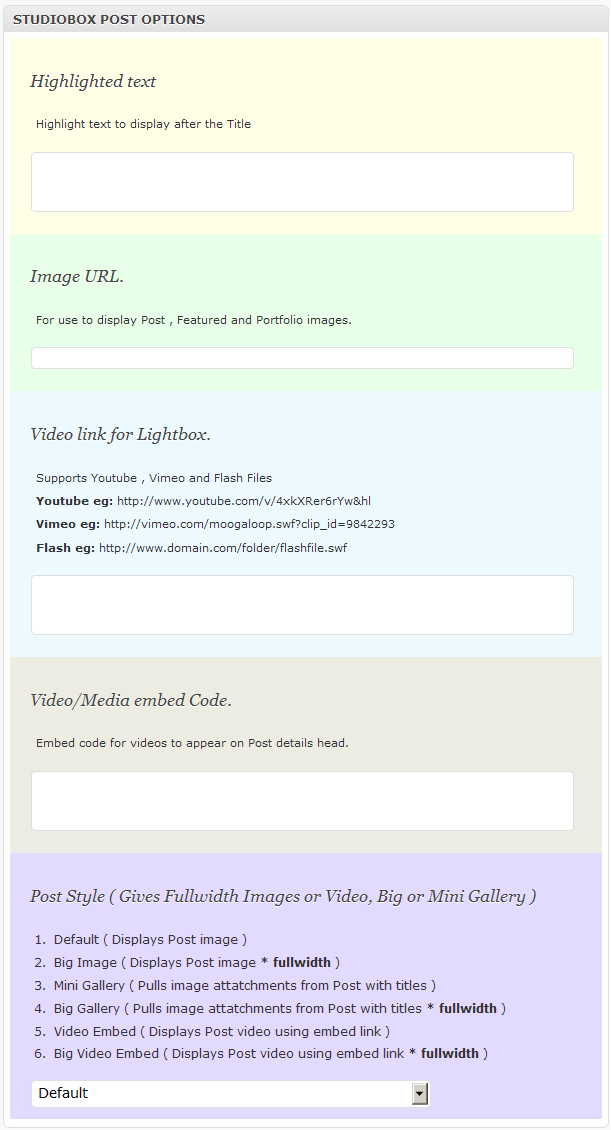
HIGHLIGHT TEXT
- Enter Text to Appear under the Post Title.
- This text is also used for the Portfolio most recent image description.
IMAGE URL
- Paste the FILE URL ( image path )
eg:
ABSOLUTE URL
http://www.yourdomain.com/wp-content/upload/image.jpg
If you encounter any ERRORS supply with a RELATIVE URL
eg:
RELATIVE URL
/wp-content/upload/image.jpg
- Paste the FILE URL ( image path )
Video link for Lightbox.
(Here are the structures for the link)- Youtube eg: https://www.youtube.com/v/4xkXRer6rYw
- Vimeo eg: http://vimeo.com/moogaloop.swf?clip_id=9842293
- Flash eg: http://www.domain.com/folder/flashfile.swf
Video/Media embed Code.
- Embed code for videos to appear on Post details head.
Post Style ( Gives Fullwidth Images or Video, Big or Mini Gallery )
- Default ( Displays Post image )
- Big Image ( Displays Post image * fullwidth )
- Mini Gallery ( Pulls image attatchments from Post with titles )
- Big Gallery ( Pulls image attatchments from Post with titles * fullwidth )
- Video Embed ( Displays Post video using embed link )
- Big Video Embed ( Displays Post video using embed link * fullwidth )
10. Creating Featured Posts
(Wordpress ADMIN panel)
- Goto WP ADMIN > POST > ADD NEW
- Fill the TITLE and CONTENTS
- Upload your IMAGE
- Copy the url in the FILE URL bar.
- Paste it in the Image URL field in the StudioBox post options in the Post page
- Tick the Featured Category.
- PUBLISH!
11. Displaying the Featured Slides
Setup Featured Category
Login to your WP-admin and
Goto StudioBox Options and click 'Featured Categories' tab
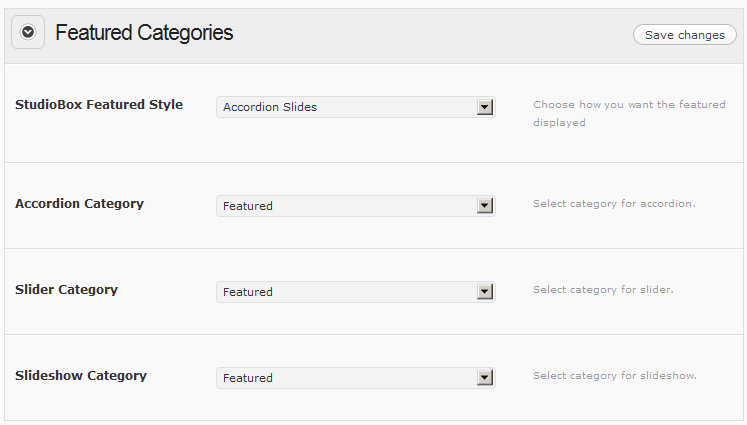
Dimensions of Featured Category Images:
Accordion (4 Posts) Images : 786px X 430px
Slider Images : 940px X 430px
Slider Images : 940px X 430px
12. MAIN PAGE Image Boxes and Column Texts
Image Boxes
Login to Wordpress ADMIN panel
Goto StudioBox Options and click 'Mainpage Setup' tab
There are three input for each image block. Marked in groups of A , B and C
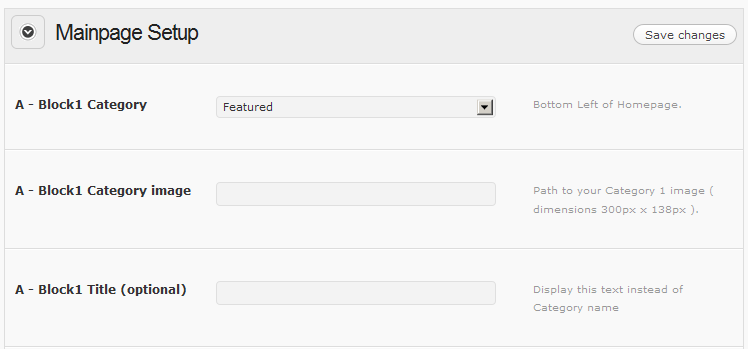
- Block Category Select a Catgory to represent it
- Block Category image Input a path for photo. Dimensions 300px × 138px
- Block Optional Title Overrides Category titles and uses the optional Title
Column Texts
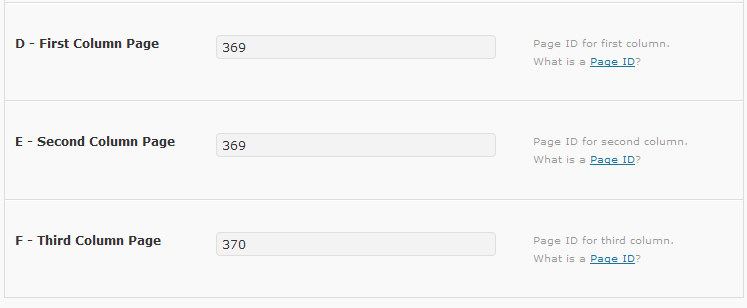
Goto StudioBox Options and click 'Mainpage Setup' tab
There are three input for each text block. D , E and F
- Enter Page ID to populate texts from
Image, Slideshow and Video Posts
13. Creating a Blog/Image Post
(Wordpress ADMIN panel)
- Goto WP ADMIN > POST > ADD NEW
- Fill the TITLE and CONTENTS
- Upload your IMAGE
- Copy the url in the FILE URL bar.
- Paste it in the Image URL field in the StudioBox post options in the Post page
- Select Default or Big Image from the Post Style.
- Tick Category. ( make sure the category is a subcategory of BLOG category )
- PUBLISH!
14. Creating Post Slideshow Gallery
(Wordpress ADMIN panel)
- Goto WP ADMIN > POST > ADD NEW
- Fill the TITLE (important for Gallery setup) and CONTENTS
- Upload your IMAGES
- Press save all
- Once the Gallery Appears you setup the order of how it'll appear. Fill the title text for the Images in the Gallery.
- No need to Insert the Gallery to the Post
- Select Mini Gallery or Big Gallery from the Post Style.
- Tick a Post Category.
- PUBLISH!
NOTE: Recommended Gallery Image Sizes
- Mini Gallery image width: 590px MAX
- Big Gallery image width: 940px MAX
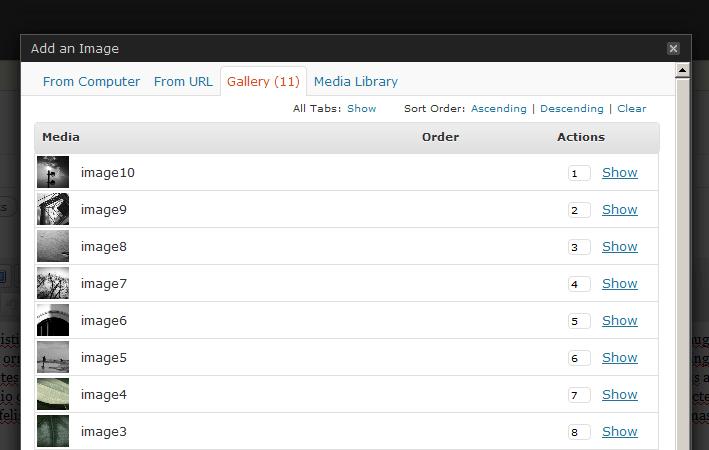
Figure 4
15. Creating a Video Post
(Wordpress ADMIN panel)
- Goto WP ADMIN > POST > ADD NEW
- Fill the TITLE and CONTENTS
- Get the Video Embed code for your media. ( From Youtube , Vimeo , etc )
- Paste the code to the Video Embed Input field
- Select Video Embed or Big Video Embed from the Post Style.
- Tick Category.
- PUBLISH!
Populating Portfolio
16. Creating Portfolio gallery
(Wordpress ADMIN panel)
- Goto WP ADMIN > POST > ADD NEW
- Fill the TITLE and CONTENTS
- Upload your IMAGE
- Copy the url in the FILE URL bar.
- Paste it in the Image URL field in the Studiobox post options in the Post page ( Refer Figure 3 )
- Tick Category. ( make sure the category is a subcategory of PORTFOLIO category )
- PUBLISH!
Populating Gallery
17. Creating a Gallery slideshow
(Wordpress ADMIN panel)
- Goto WP ADMIN > POST > ADD NEW
- Fill the TITLE and CONTENTS
- Upload your IMAGE
- Copy the url in the FILE URL bar.
- Paste it in the Image URL field in the Studiobox post options in the Post page ( Refer Figure 3 )
- Tick Category. ( make sure the category is a subcategory of PORTFOLIO category )
- PUBLISH!
Contact Page
18. Contact Page Template
(Wordpress ADMIN panel)
- Goto WP ADMIN > PAGE > ADD NEW
- Fill the TITLE and CONTENTS
- Select Contact Form from Template list
- Make sure you've entered your email address in the Theme options 'Studiobox General Settings'
- PUBLISH!
AD Boxes
19. Placing Advertisements
- Goto WP ADMIN > Appearance > Studiobox Options
- Fill Ad Box 1 , Ad Box 2 , Ad Box 3 and Ad box 4 (Refer Figure 5)
- Each Ad Box carries to inputs. One for the image path and second for the target link.
eg.
Upload Advertisement image to your image directory and place this path to the image as the image path.
The target link path is where you want the visitor to go once the AD is clicked. - Create a Page titled as Advertisement Contact ( anything in reference to ADS - This page will be linked to AD-Blocks once the SLOT is left blank. To make it blank simply remove any image links you've entered to the AD Block.
- To display an Advertise here adbox, just enter a # as the Adbox target link. (as long as image path is left blank along with some text in the ad link it'll show the Advertise here request image)
- If both image path and ad link path is left blank, the ad box won't appear.
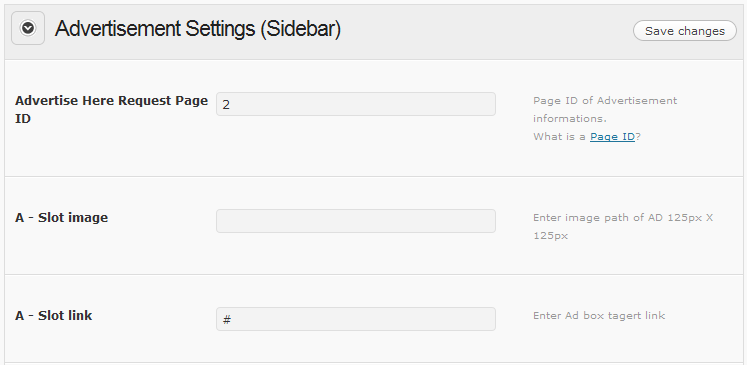
Figure 5
Footer
20. Footer Link List
- Ceate a Link List
- Add the Link List as a Widget to Footer 1 and 2
- If both image path and ad link path is left blank, the ad box won't appear.
21. Footer About Column
- If empty then About text is displayed
- You can add an image from Theme Options Footer Setting
22. Footer Portfolio / Flickr Column
- From Theme Options Footer setting you can select which category to display the images from
- You can also use Flickr-RSS plugin to fetch Flickr photos to the column.
23. Footer - Adding Flickr images
- Download the Flickr RSS Wordpress plugin
http://eightface.com/wordpress/flickrrss/ - Activate the Plugin
- Add the Widget to the 4th Footer Column
- To setup groups and photos simply follow the plugin instructions.
- Before List:
<div class="flickr-box">
- After List:
</div>
24. Recommended Plug-ins to Download
- Pagenavi Plugin
http://wordpress.org/extend/plugins/wp-pagenavi/
25. Javascript
This theme imports Javascript files used by JQuery to create the Flow Slides and the Popups of larger pictures when clicked.
jQuery, JQuery ColorBox, JQuery Dropdown
jQuery is a Javascript library that greatly reduces the amount of code that you must write.
26. PSD Files
I've included are layered PSD's with this theme:
1) You'll find 1 PSD file in the themes PSD folder. The PSD file is layered and those that need slicing will have guidelines.
Once again, thank you so much for purchasing this theme. As I said at the beginning, I'd be glad to help you if you have any questions relating to this theme. If you have a more general question relating to the themes on ThemeForest, you might consider visiting the forums and asking your question in the "Item Discussion" section or send a direct email to me via my profile.
Once again, thank you so much for purchasing this theme.
As I said at the beginning, I'd be glad to help you if you have any questions relating to this theme. If you have a more general question relating to the themes on ThemeForest, you might consider visiting the forums and asking your question in the "Item Discussion" section or send a direct email to me via my profile.Sections
- About the StudioBox Wordpress theme
- Fonts, icons and plug-ins in use
- Cufon Fonts
- Customize Logo
- Setup Core Categories
- Top Navigation Menu
- Setting up Menu arrows
- Setup cache folder
- Post Options Explained
- Creating Featured Posts
- Displaying the Featured Slides
- MAIN PAGE Image Boxes and Column Texts
- Creating a Blog/Image Post
- Creating Post Slideshow Gallery
- Creating a Video Post
- Creating Portfolio gallery
- Creating a Gallery slideshow
- Contact Page Template
- Placing Advertisements
- Footer Link List
- Footer About Column
- Footer Portfolio / Flickr Column
- Footer - Adding Flickr images
- Recommended Plug-ins to Download
- Javascript
- PSD Files
StudioBox Help Guide <end>
This is a Help Guide for StudioBox Premium Wordpress Template